NestForge CLI
Install and use the NestForge CLI for scaffolding, generators, database workflows, and OpenAPI export.
The nestforge CLI is the main workflow tool for creating a new application,
generating feature code, running database migration commands, and exporting
OpenAPI artifacts.
The VS Code extension builds on the same command surface. If you understand the CLI first, the editor commands become easier to follow.
Install the CLI
Section titled “Install the CLI”You need a Rust toolchain before installing the CLI.
cargo install --path crates/nestforge-cliAfter installation, verify that the command is available:
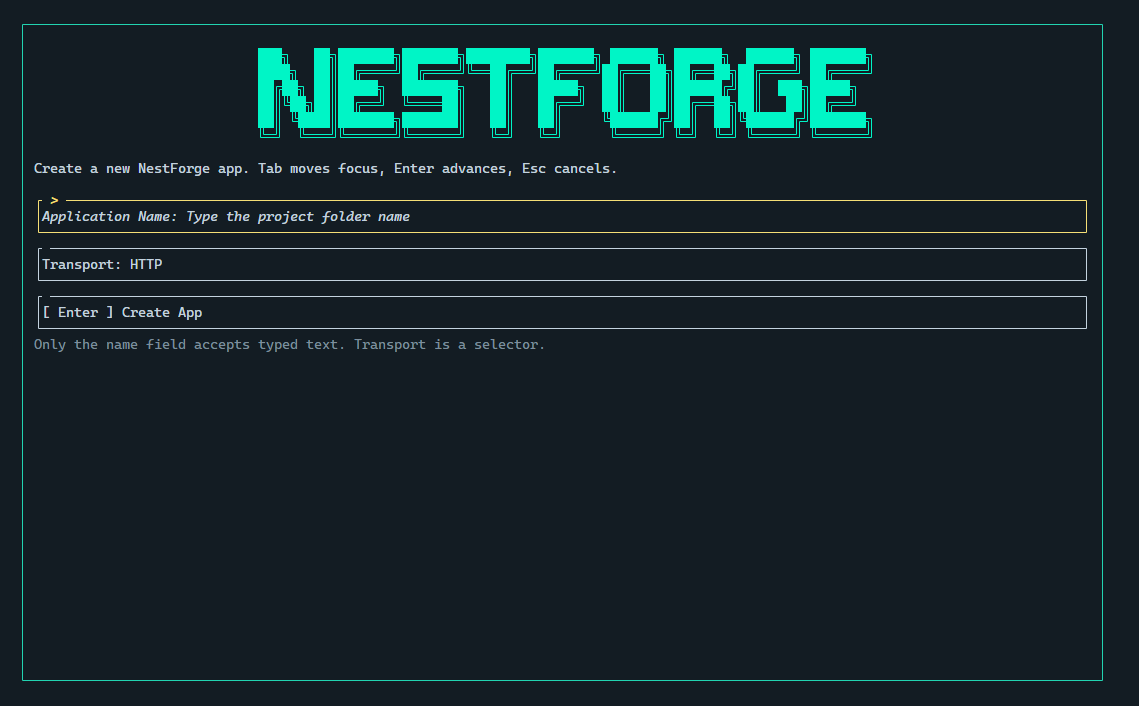
nestforge --helpInteractive Mode
Section titled “Interactive Mode”The CLI automatically detects whether your terminal supports interactive features. When running in an interactive terminal (such as a proper TTY or supported terminals like bash, zsh, or Windows Terminal), it enables the TUI for a richer experience.
For non-interactive environments (such as CI/CD pipelines, scripts, or legacy terminals), use the --no-tui flag to disable TUI features:
nestforge new my-api --no-tuinestforge g module users --no-tuiCommand families
Section titled “Command families”The CLI groups its workflow into five areas:
newgenerateorgdbexport-docsordocsfmt
Scaffold a new application
Section titled “Scaffold a new application”Use new to create a fresh NestForge project.
nestforge new my-apinestforge new my-api --transport grpcnestforge new my-api --openapinestforge new my-api --transport websockets --no-tuiAvailable options:
<app-name>sets the project folder and package name--transportselectshttp,graphql,grpc,microservices, orwebsockets--openapiwires OpenAPI setup into supported application scaffolds--no-tuidisables interactive prompts
The generated HTTP scaffold keeps its bootstrap files at the root of src/ and
uses the current factory helpers in src/main.rs.
Generate code inside an existing app
Section titled “Generate code inside an existing app”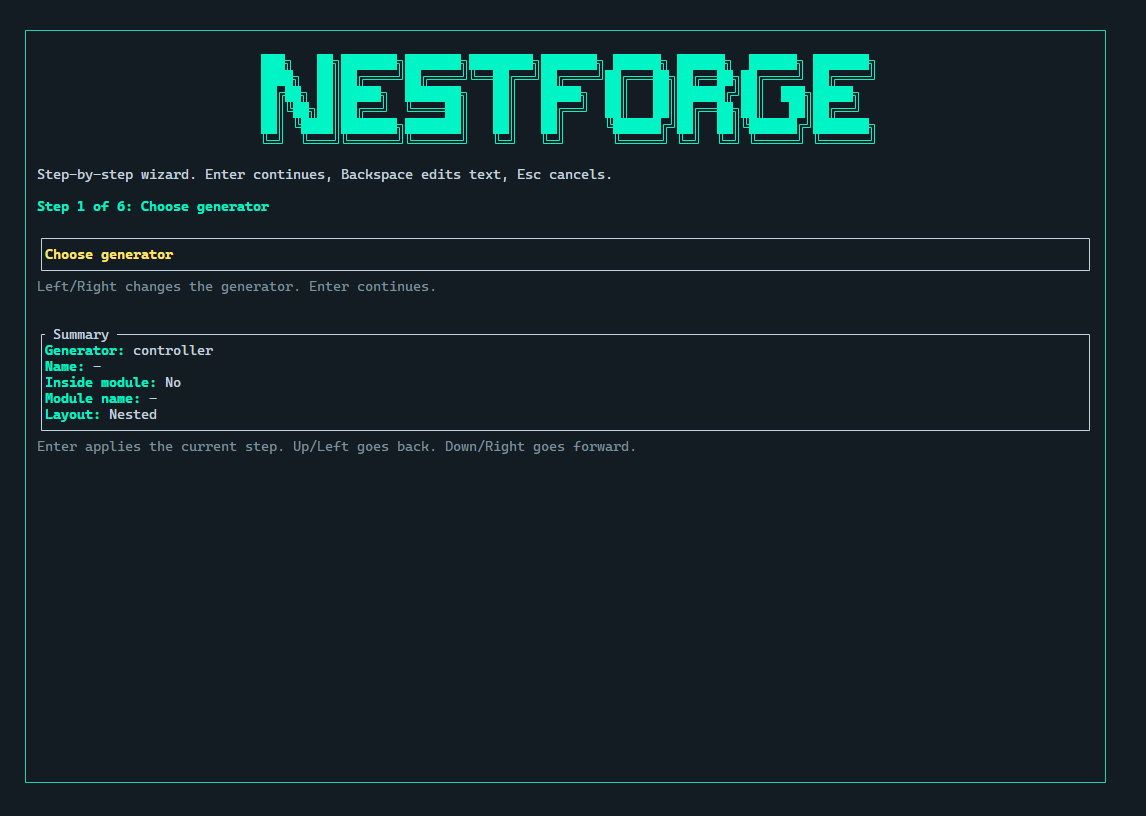
Use generate or the short alias g once you are inside an application
workspace.
nestforge g module usersnestforge g resource users --module usersnestforge g service usersAvailable generator kinds:
resourcecontrollerservicemoduleguarddecoratorfiltermiddlewareinterceptorserializergraphqlgrpcgatewaymicroservice
Common options:
--module <name>targets an existing feature module--flatkeeps generated files in the module root--no-promptskips interactive DTO field prompts--no-tuidisables interactive prompts
Core generators
Section titled “Core generators”Use these commands to build the normal application structure:
nestforge g module usersnestforge g controller users --module usersnestforge g service users --module usersnestforge g resource users --module usersmodulecreates a feature boundarycontrolleradds a controller stubserviceadds a service stubresourcegenerates a controller, service, and DTO set together
Cross-cutting generators
Section titled “Cross-cutting generators”These generators add reusable framework pieces:
nestforge g guard authnestforge g decorator current_usernestforge g filter http_exceptionnestforge g middleware request_loggernestforge g interceptor timingnestforge g serializer userguardcreates authorization flowdecoratorcreates custom parameter or metadata helpersfiltercreates exception handling logicmiddlewarecreates request pipeline middlewareinterceptorcreates response or execution wrappersserializercreates response shaping helpers
Transport generators
Section titled “Transport generators”Use these when you are adding transport-specific features:
nestforge g graphql usersnestforge g grpc billingnestforge g gateway eventsnestforge g microservice notificationsgraphqladds GraphQL-oriented module filesgrpcadds gRPC-oriented transport filesgatewaycreates a WebSocket gatewaymicroserviceadds a microservice handler module
Flat and nested layouts
Section titled “Flat and nested layouts”resource generation supports both nested and flat layouts.
nestforge g resource users --module usersnestforge g resource users --module users --flatUse the nested layout when you want separate folders such as controllers/,
services/, and dto/. Use --flat when you want the generated files to stay
directly under the feature root.
DTO prompting
Section titled “DTO prompting”When resource generation runs in an interactive terminal, the CLI can prompt
for DTO fields before writing the generated files.
nestforge g resource users --module usersnestforge g resource users --module users --no-promptUse --no-prompt when you want the default DTO shape without the field prompt
workflow.
Database commands
Section titled “Database commands”Use db for the built-in migration workflow.
nestforge db initnestforge db generate create_users_tablenestforge db migratenestforge db statusinitprepares the migrations folder and tracking filesgenerate <name>creates a timestamped migration filemigrateapplies pending SQL migrations usingDATABASE_URLstatuscompares the recorded migration state with local files
Export OpenAPI docs
Section titled “Export OpenAPI docs”Use export-docs to generate a static OpenAPI document from the current app.
The docs command is an alias that also opens the interactive CLI docs browser.
nestforge export-docsnestforge docs --format yaml --output docs/openapi.yamlnestforge docs --no-tuinestforge docs modulesThe docs command supports:
--no-tui- Disable interactive TUI, output plain text<topic>- Jump directly to a specific topic (e.g.,modules,services,controllers)
Available topics include: modules, services, controllers, guards, interceptors, middleware, pipes.
Available options:
--formatacceptsjsonoryaml--outputwrites to a custom file path--titlesets the OpenAPI document title--versionsets the OpenAPI document version--module-typeselects the root module type to inspect
Format sources
Section titled “Format sources”Use fmt when you want the CLI to run cargo fmt in the current app root.
nestforge fmtPrelude and App Barrels
Section titled “Prelude and App Barrels”New scaffolds generated with NestForge include a root src/lib.rs barrel with pub use re-exports for top-level app symbols, and a slimmer src/main.rs that imports from the package crate.
This gives generated apps a flatter import style:
use demo_api::AppModule;use nestforge::prelude::*;The nestforge::prelude::* import provides common framework imports including:
- Controller macros and attributes
- Injectable macros
- Request types (Param, Query, Body, etc.)
- Response types and helpers
Setup checklist
Section titled “Setup checklist”Before relying on the CLI for daily work, make sure:
- Rust and
cargoare installed nestforge --helpruns successfully- your NestForge workspace has
Cargo.tomlandsrc/ DATABASE_URLis set before running migration commands- the relevant Cargo features are enabled for transport or OpenAPI workflows
If you prefer working inside the editor, continue with VS Code Extension.